Terminal Setup
To run Git, we’re going to use the terminal. I know that the terminal might sound scary, and it is. But you can’t learn without making mistakes. macOS users can use the default terminal app with Zsh. For Windows users, I recommend using PowerShell as your terminal shell.
For clarity, the terminal, aka The Black Screen is the application you open on your computer. It provides a window where you can type commands. The shell is the program running inside the terminal. It interprets the commands you type and executes them.
Running Commands
A command is a set of instructions that tell the shell to do something. Its like opening Microsoft Word, but from the terminal.
Structure
Commands are structured like this:
command sub-command [optional-flags] [arguments]
Command: The main tool or program you want to use.
Sub-command: The specific action you want to perform with the tool.
Optional-flags: Extra options to modify the behavior of the command.
Arguments: Additional information or targets for the command.
Example
Let’s say we want to call Batman using the phone program, and we want to use the loud-speaker.
phone call --loud-speaker Batman
Phone: This tells the terminal to run the “phone” program.
Call: This specifies to call someone using the phone program.
--loud-speaker: This specifies that the phone program should use the loud-speaker.
Batman: This specifies that we want to call Batman.
Starting Directory
The starting directory is the directory that the terminal loads up when you open it. It’s a good idea to make the starting directory the directory where you keep your coding projects.
Create Directory
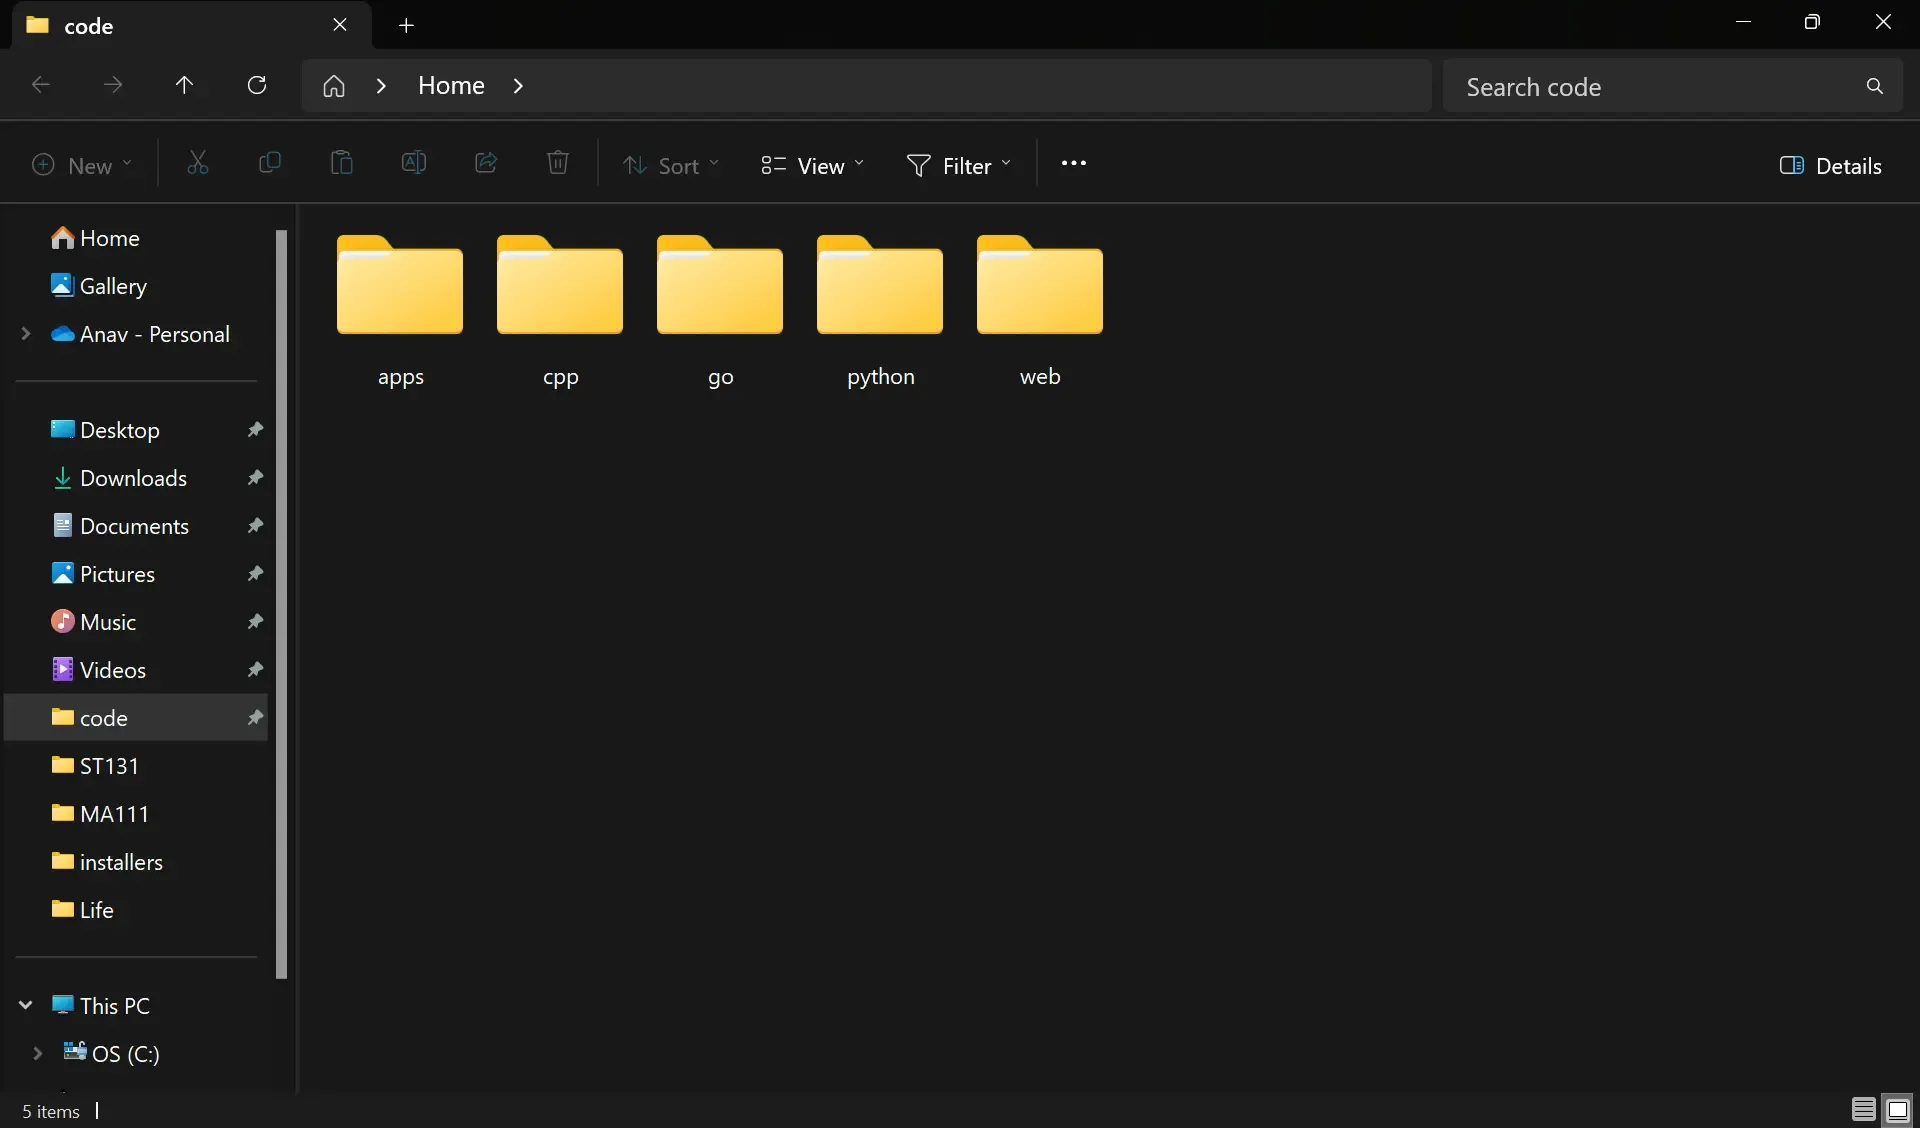
To keep things organized, let’s make a code directory. You can place this directory anywhere on your computer. Mine is located at C:/Users/anav/code. This is what it looks like:

Configure Terminal
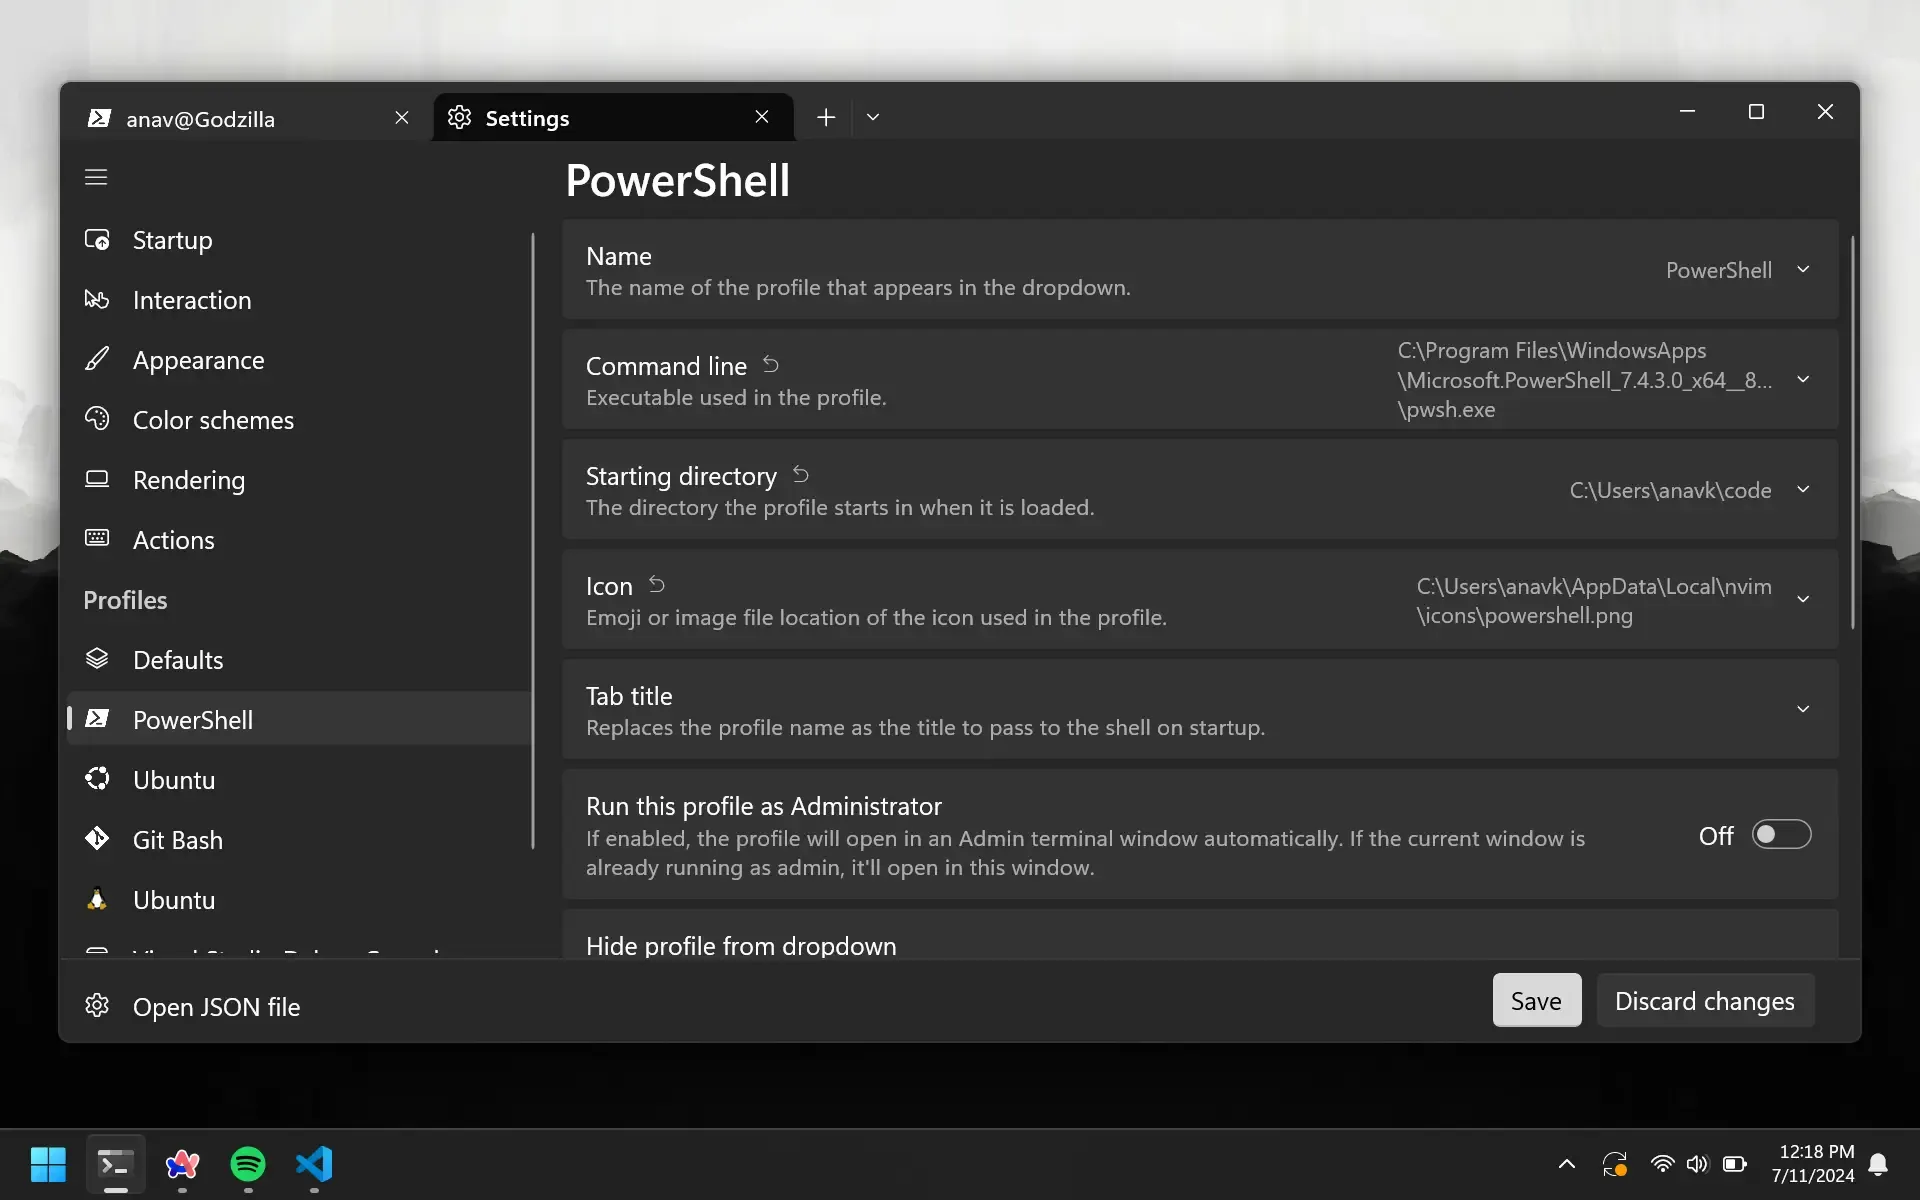
Now that we have our directory, let’s configure the terminal to open in this directory.
- Windows -
Settings > Profiles > Starting Directory. - macOS
Preferences > General > Working Directory.

Every time you open the terminal, it will already be in the directory we chose.
Navigating Directories
Navigating directories is a very important skill. It’s the same as look for files and folders using the file explorer. Let’s say we want to go to the cpp directory that is inside the code directory.
Change Directory
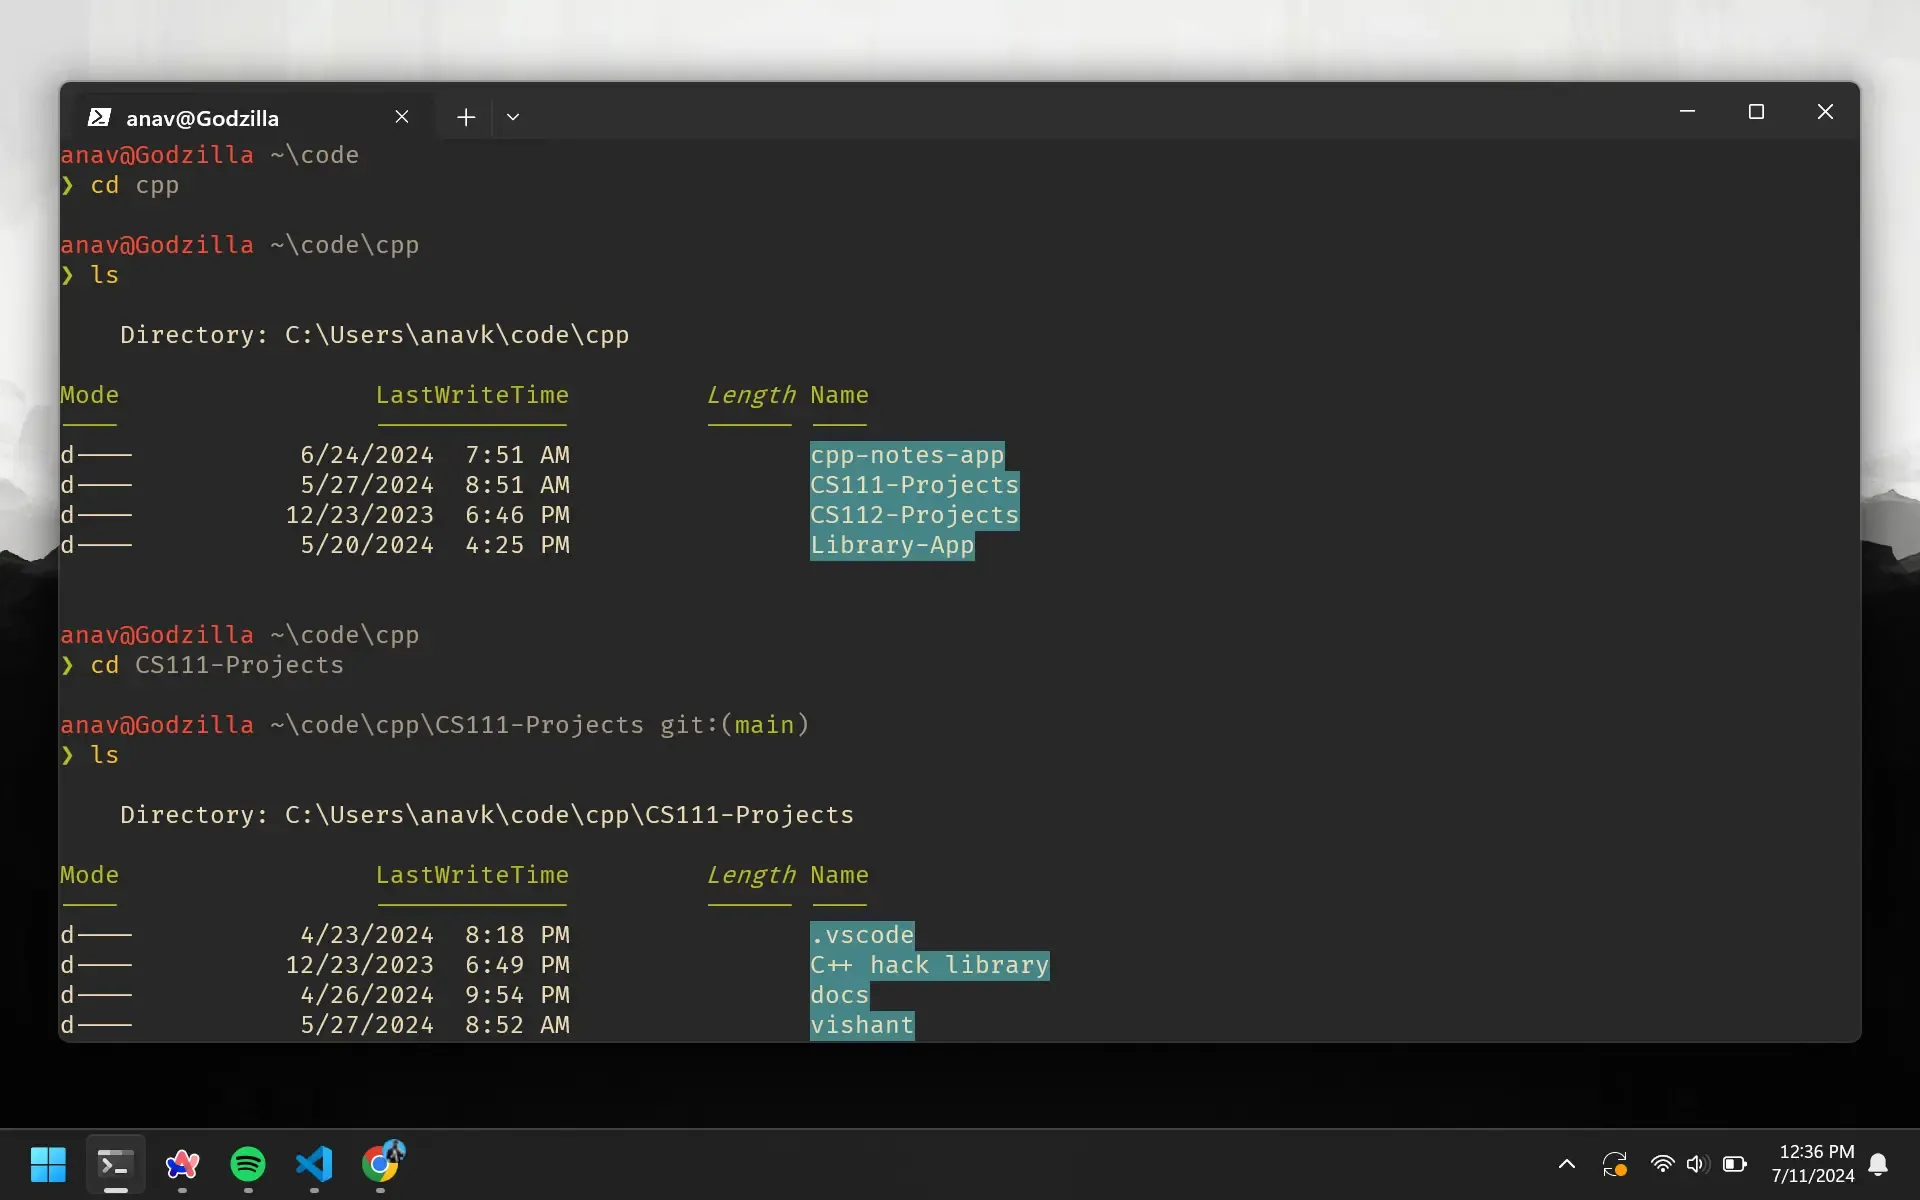
Assuming that the code directory is in the starting directory, we can use the cd command to change directories. This will change the directory to the cpp directory.
cd cpp
Now let’s go into a project in the cpp directory. Oh but what if we don’t know the name of the directory?
List Directories
We can use the ls command to list the contents of the current directory.
ls
Once we know the name of the directory, we can use the cd command to change directories again.
cd CS111-Projects
All of this combined should look something like this:
